Blueprint Farming Guide — Unlock Every Recipe
Master View All blueprints: where to farm them, what to unlock first, efficient routes, and how to sell duplicates for coin. Stop relying on RNG; craft smart.
TL;DR
- Blueprints permanently unlock crafting at Speranza workbenches — learn first, sell duplicates for 5,000 coins each.
- Farm high-value Hidden Caches, Harvester events (Jupiter, Equalizer), Raider Bodies, and finish Faction Missions for guaranteed recipes.
- Prioritize Refiner blueprints (Advanced Mechanical Components, ARC Circuitry) then one primary weapon and its magazine/recoil mods.
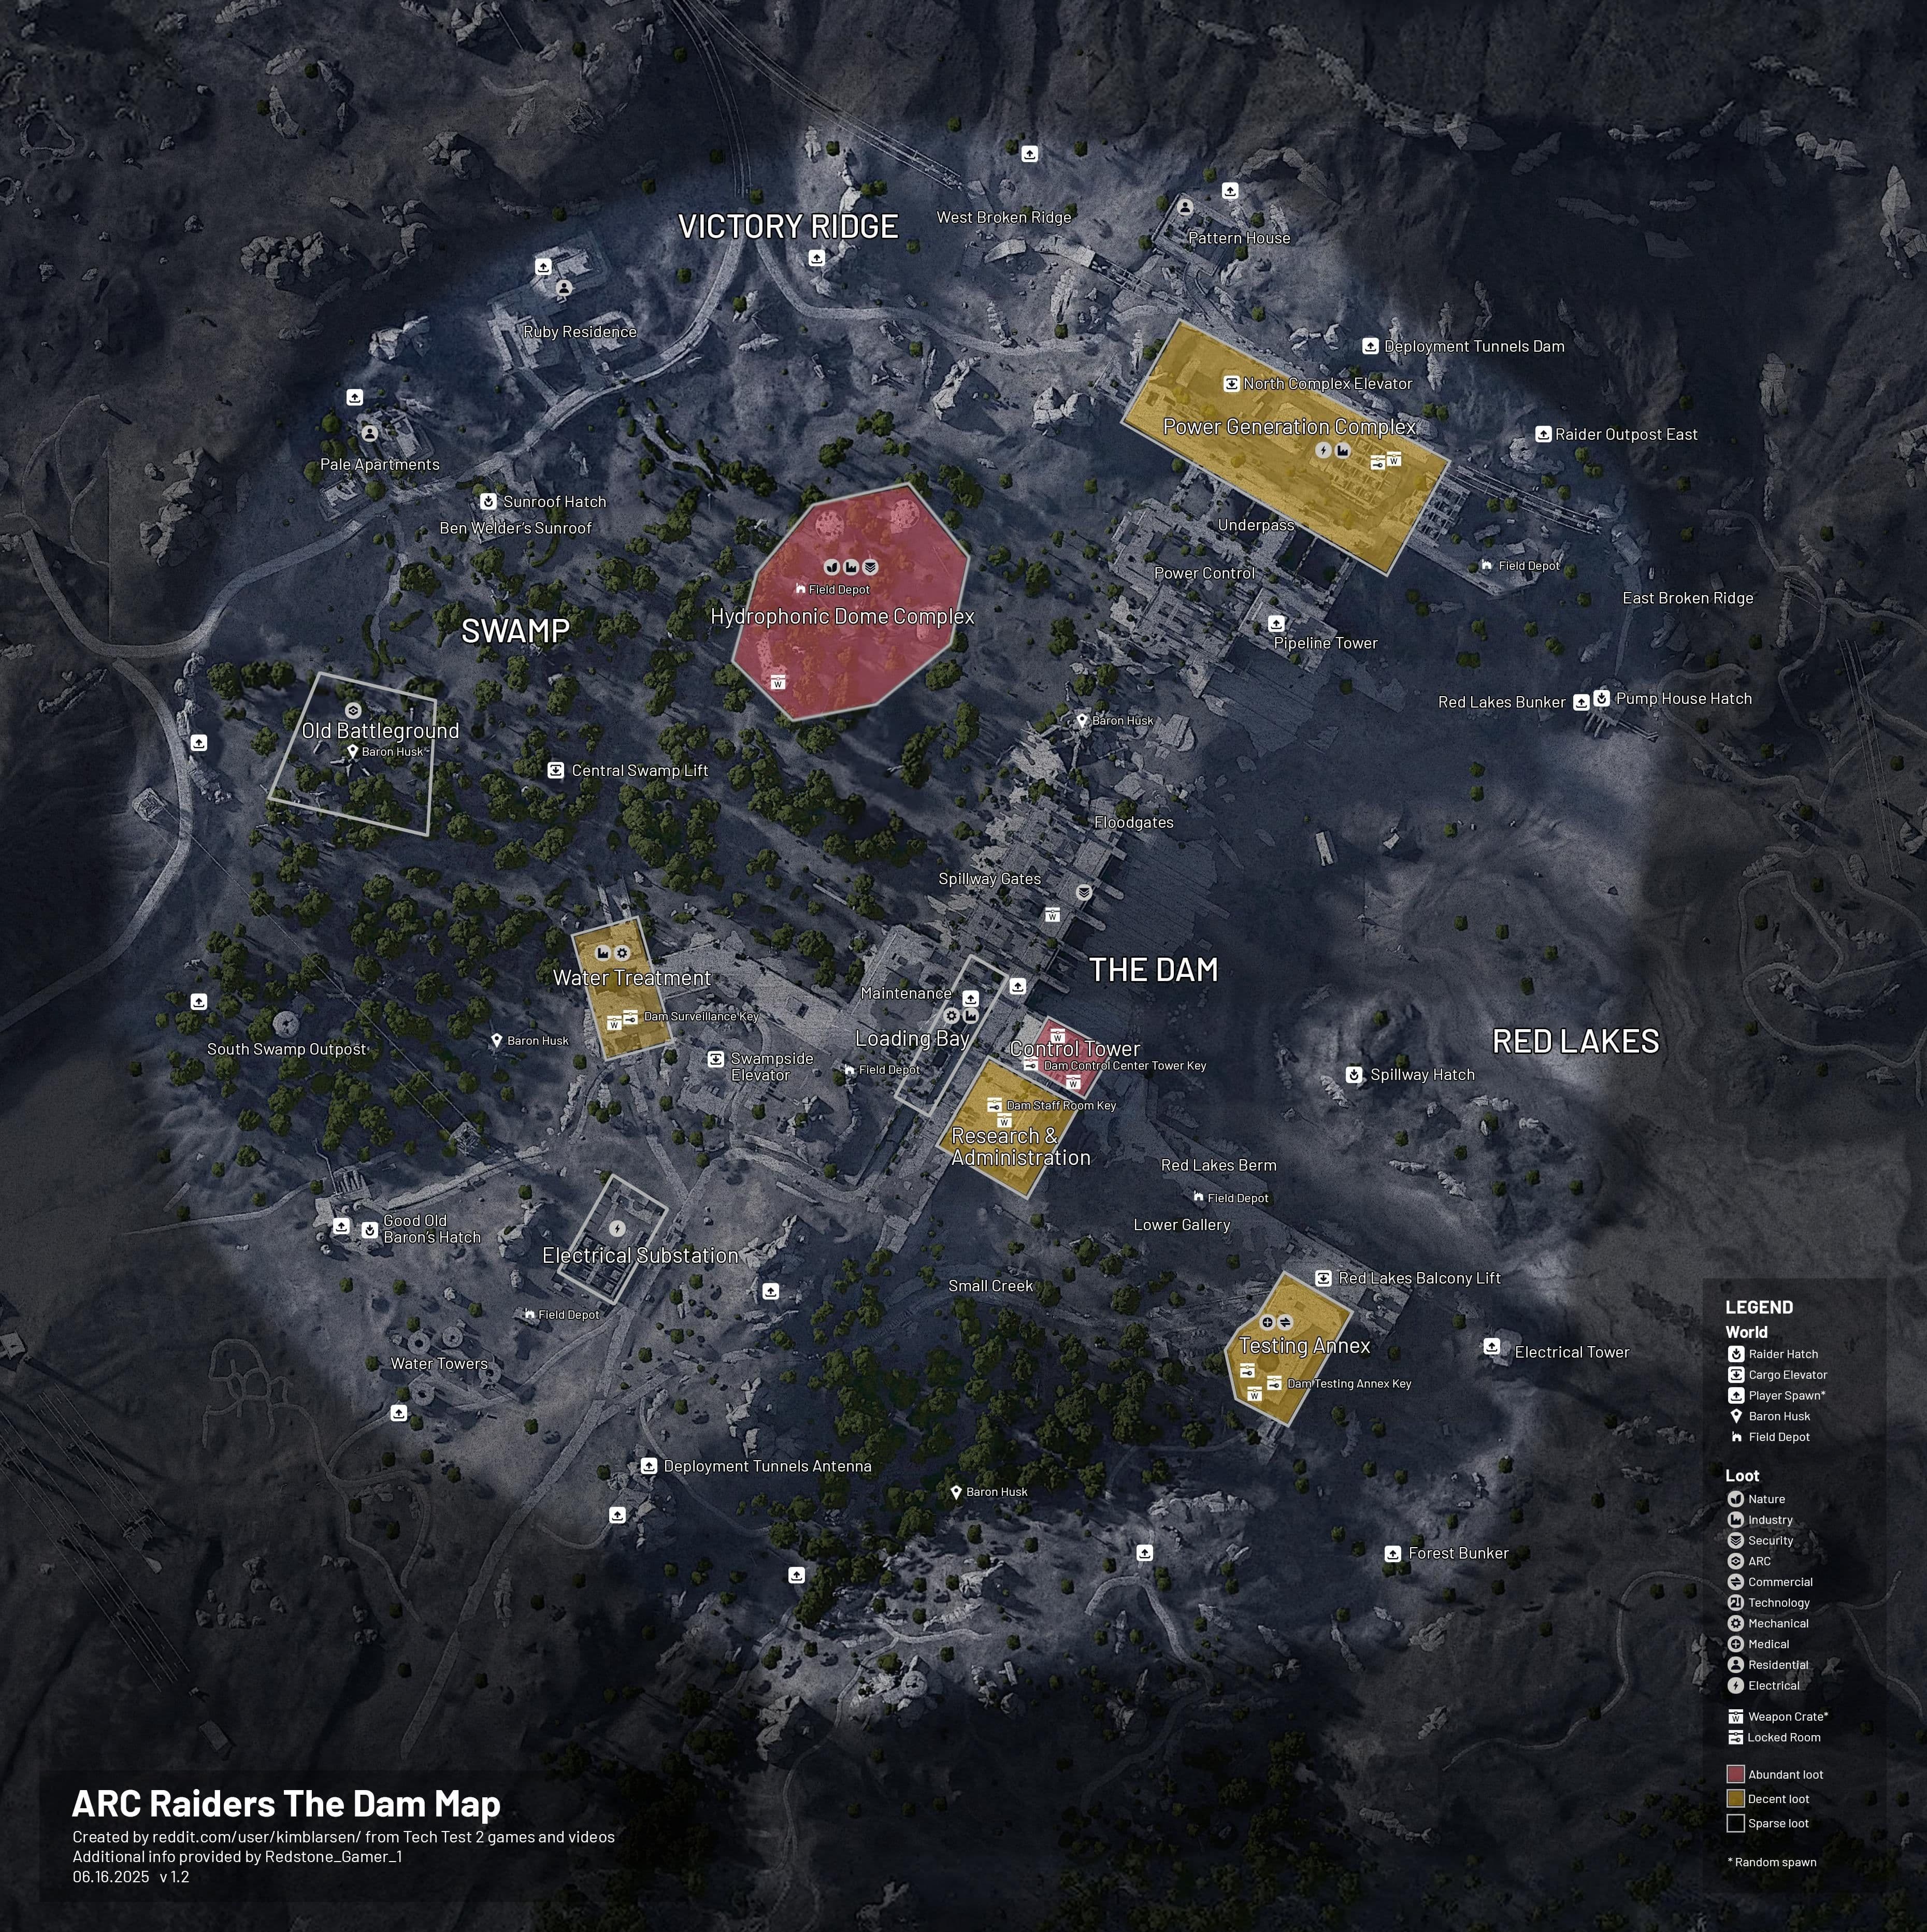
- Use the Dam Map Cache Circuit and Blue Gate Village routes, store unlearned blueprints in safe slots, and track Harvester cycles.
What You Need to Know First
Quick orientation before you start burning keys and batteries. Blueprints are permanent Speranza crafting station unlocks — find, Learn and Consume, then craft forever as long as you have materials. Unlearned blueprints can be lost on bad extracts; duplicates sell for 5,000 coins.
Prerequisites & priorities you should care about:
- Bench unlocks: Gunsmith Station, Refiner Station, Utility Station — higher tiers (Bench III) are required for advanced blueprints.
- Early material gates: Mechanical Components, Oil, ARC Circuitry, Advanced Mechanical Components.
- Events: Harvester cycles drop energy weapon blueprints (Jupiter, Equalizer).
| Item | Effect | Where to Get |
|---|---|---|
| Speranza Workbench (Gunsmith/Refiner/Utility) | Enables crafting from learned blueprints | Faction vendors / workbench unlock quests |
| Hidden Caches | High chance for Rare/Epic blueprints | Dam map caches, relay stations, hidden boxes |
| Harvester Event | Guaranteed energy weapon blueprints (Jupiter, Equalizer) | Harvester event reward pool |
| Raider Bodies | Common/medium blueprint drops | High-traffic zones; corpses of AI and players |
| Faction Vendors | Purchase specific blueprints at Vendor Level thresholds | Earn reputation through missions |
| Power Cells/Keys | Open locked caches and rooms | Generators, guard posts, mission rewards |
What to learn first (order of operations):
- Refiner Station blueprints that convert raw into refined components (Advanced Mechanical Components, ARC Circuitry).
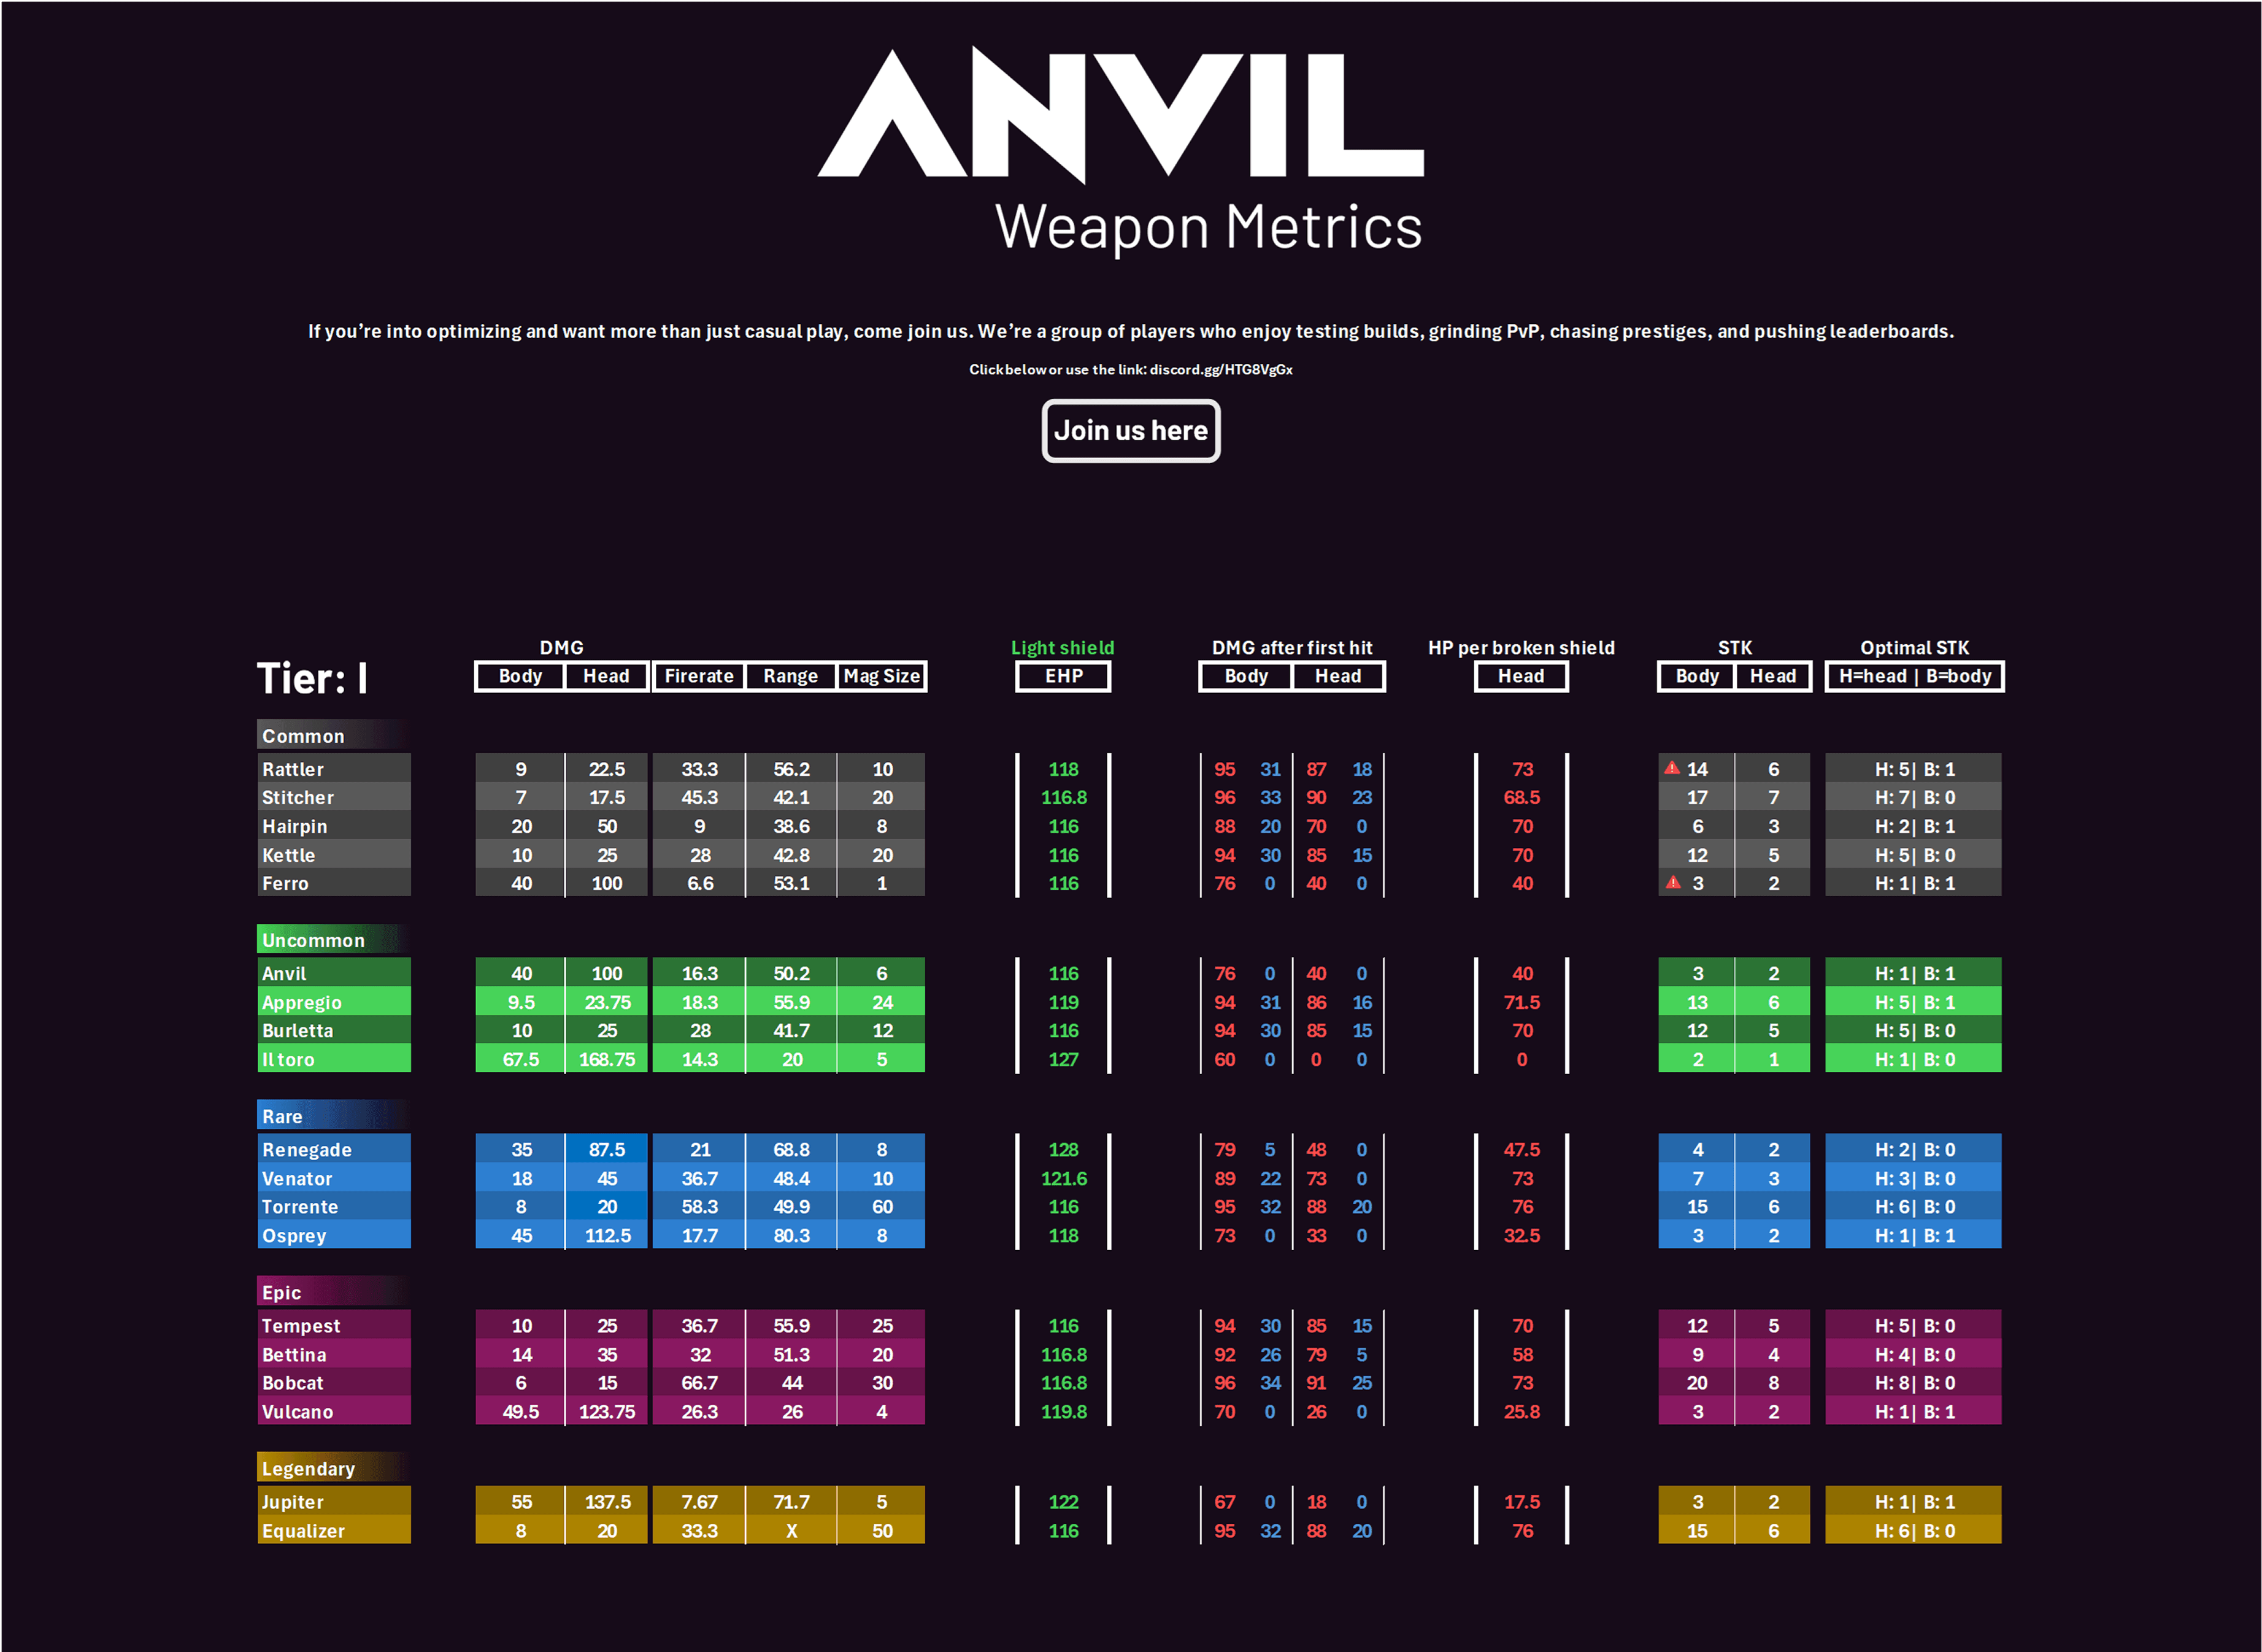
- One primary weapon blueprint that matches your playstyle (Anvil for balance, Torrente for CQB).
- Magazine Extensions and essential mods for that weapon.
- Medical items and utility tools (Defibrillator, Lure Grenade).
A small sanity note: the Equalizer and Jupiter require Harvester participation. If you skip those events, you miss those recipes entirely.
Step-by-Step Guide
Follow these steps like a checklist. Each loop is designed to minimize RNG frustration and prioritize long-term crafting power.
-
Prep: Bench & Material Baseline
- Unlock Refiner Station tiers so you can craft Advanced Mechanical Components and ARC Circuitry. Without these you’ll burn hours farming raw drops.
- Stockpile basics: 50+ Mechanical Components, Oil, Steel Springs, Wires. You need reserves to avoid crafting roadblocks.
-
Early Runs: Secure Refiner Blueprints
- Hit low-risk runs to collect components and vendor reputation. Faction Missions guarantee specific blueprints; complete them in batches.
-
Route: Dam Map Cache Circuit (12-minute loop)
- Start southern relay station, clear three cache spawns within 400m, then sweep the dam structure and water treatment areas.
- Open caches with Power Cells or keys. Caches have High drop rates for Rare blueprints.
-
Route: Blue Gate Village Run
- Grab the Confiscation Room key from village guard posts, clear the room for a guaranteed rare blueprint, then hit nearby hidden caches.
- Extract via northern tunnels to avoid heavy PvP.
-
Event Priority: Harvester Cycles
- Drop everything if Harvester starts. Jupiter and Equalizer drop exclusively here. Coordinate with squad to ensure a clean completion.
-
Learn vs. Sell Decision
- Learn low-to-mid-tier blueprints that scale into your late game. Sell redundant commons for 5,000 coins to fund vendor purchases.
- Safe slot unlearned blueprints before risky runs; losing an expensive unlearned blueprint is a time sink.
-
Progression and Crafting
- After you have Refiner materials, focus on one weapon path and its mod chain (magazine/recoil/stock).
- Craft in bulk during low-traffic hours, then sell high-tier crafted weapons during peak times for profit.
Blueprint sources and quick reference:
| Item | Effect | Where to Get |
|---|---|---|
| Hidden Caches | High | Dam caches, relay stations |
| Mission Rewards | Guaranteed | Faction missions, event rewards (Harvester) |
| Raider Bodies | Medium | High-traffic areas; player deaths |
| Faction Vendors | Purchase | Vendor Level thresholds (purchase with reputation) |
Workshop categories & examples:
| Item | Effect | Where to Get |
|---|---|---|
| Gunsmith Station blueprints (Anvil I, Jupiter) | Primary weapons — require mechanical and refined parts | Found in caches, missions, events |
| Refiner Station blueprints (Advanced Mechanical Components) | Converts raw drops into high-tier materials | Vendor unlocks, mission rewards |
| Utility Station blueprints (Lure Grenade, Snap Hook) | Tactical tools | Hidden caches, vendor purchases |
Crafting economics snapshot you should memorize:
| Item | Effect | Where to Get |
|---|---|---|
| Anvil I | 1x Mechanical, 3x Oil; ~2,500 coins to craft; market ~8,000 | Early common weapon blueprint |
| Extended Magazine III | 1x Mod Components, 6x Steel Spring; ~4,000 coins; market ~12,000 | Mid-tier magazine mod |
| Jupiter | 3x Magnetic Accelerator, 3x Complex Gun Parts; ~15,000 coins; market ~45,000 | Harvester event / rare blueprint |
| Defibrillator | 3x Plastic Parts, 1x Moss; ~1,200 coins; market ~5,000 | Medical utility blueprint |
Final loop: Rotate refinery runs, Dam Cache Circuit, Blue Gate runs, and always jump on Harvester events. Stack vendor reputation in between: those vendor-only blueprints eventually remove RNG from your build.
Pro Tips
- Prioritize Refiner Station blueprints first. Advanced Mechanical Components and ARC Circuitry let you turn trash into tiered crafting parts — that multiplier is the real XP.
- Safe-slot every unlearned rare or epic blueprint before a risky extract. If you lose one, the hours you spent farming evaporate faster than a Sopranos alibi.
- When Harvester is live, treat it like a raid night — squad up, assign roles (clearers, extraction point guard), and run it until you have Jupiter or Equalizer orbs.
- Trade materials with squadmates. If you have 20x Rope but lack Advanced Electrical Components, swap rather than grind another hour of the same node.
- Craft in bulk during off-peak hours, then sell during peak. Market value spikes when demand is high and supply is low; timing equals profit.
Common Mistakes to Avoid
- Hoarding unlearned blueprints into risky runs — losing an unlearned rare wastes far more time than selling it for vendor gear.
- Skipping Refiner blueprints and trying to craft endgame weapons immediately — you’ll bottleneck on Mod Components and ARC parts.
- Focusing only on weapons and ignoring Utility Station blueprints (Lure Grenade, Barricade Kit). Those items win fights more often than another marginal DPS increase.