Dispatch: Best Hero Builds, Stats & Powers
Master View All's Dispatch roster: best hero stat roles, key powers, and synergy pairings. Build specialists and generalists for consistent mission success.
TL;DR
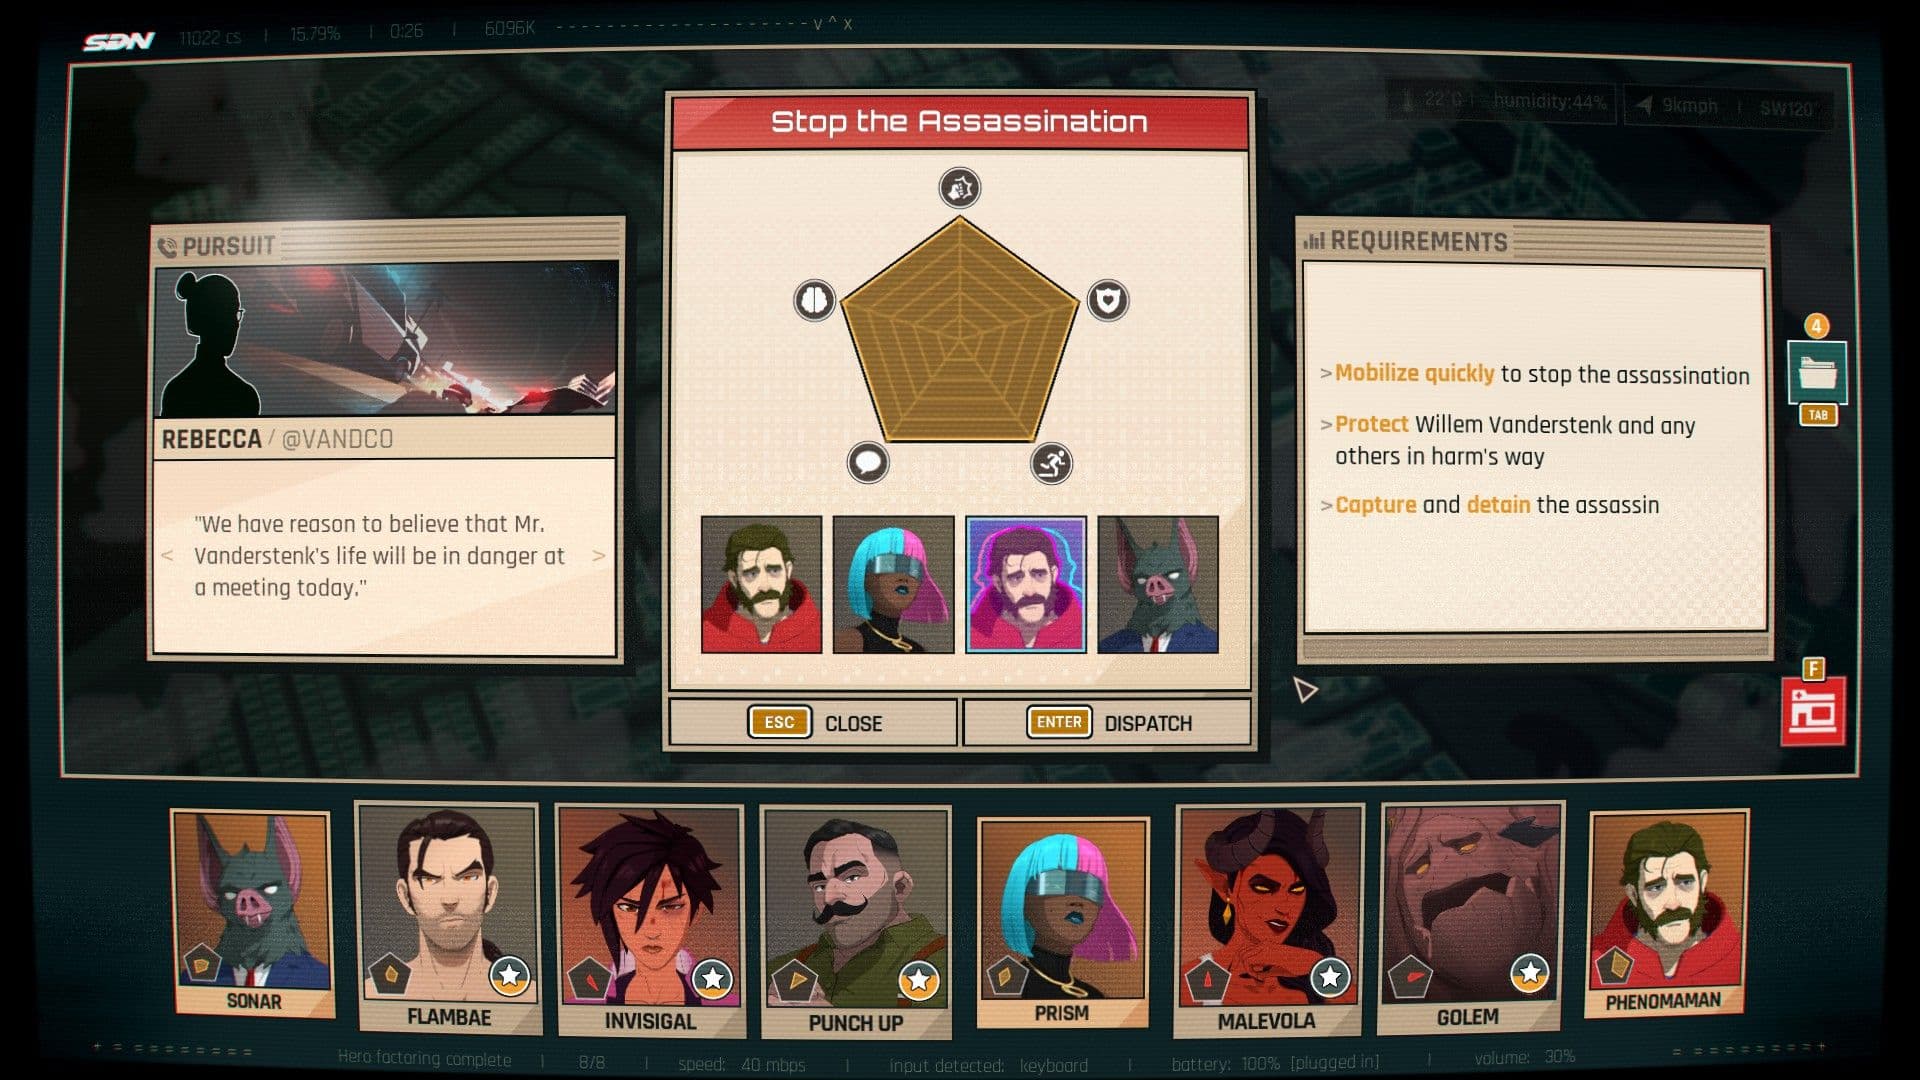
- Match the mission type to the hero's top stat: Combat for fights, Charisma for social, Mobility for time-sensitive, Intelligence for puzzles, Vigor for tanking.
- Mix specialists (high 2–3 stats) and generalists; specialists win niche fights, generalists cover messy midgame missions.
- Key synergies: Sonar↔Malevola, Flambae↔Prism, Invisigal↔Golem, Coupe↔Punch Up. Use them to amplify strengths or cover weaknesses.
- Watch momentum heroes (Flambae) and solo-only effects (Invisigal). Phenomaman and Waterboy need special handling.
What You Need to Know First
Before you start reassigning slots like a mob boss rearranging his crew, get the basics straight. Heroes run on five stats and each mission usually cues which one matters most. Below are prerequisites and the small set of resources you’ll actually need.
| Item | Effect | Where to Get |
|---|---|---|
| Heroes (Roster) | The units you dispatch. Each has starting stats and abilities | Recruit via Campaign/Events |
| Skill Points | Spend on stats/abilities after level-ups | Earn XP from successful missions |
| Mission Slots | 1–4 positions; some powers care about slot position | Standard mission UI |
| XP | Levels grant skill points; failed missions give no XP | Complete missions successfully |
Core stat quick reference:
| Item | Effect | Where to Get |
|---|---|---|
| Combat | Physical confrontation and aggressive checks | Hero base stats / skill points |
| Intelligence | Puzzles, technical challenges, dialogue options | Hero base stats / upgrades |
| Charisma | Negotiation, de-escalation, crowd control | Hero base stats / upgrades |
| Mobility | Response speed, chases, time-sensitive checks | Hero base stats / positioning |
| Vigor | Damage resistance and durability (not direct combat) | Hero base stats / gear |
Minimum practical levels: heroes don’t need to be maxed to be useful, but specialist strategies expect at least a few level ups. Remember: failed missions provide no XP, so don’t gamble your progress on edge-case runs early on.
Step-by-Step Guide
-
Build your baseline roster
- Start with a mix: 2 specialists and 2 generalists is a safe split. Specialists should dominate 2–3 stats; generalists spread points.
-
Assign roles by mission type
- Combat-heavy: send heroes with the highest Combat.
- Social/negotiation: Charisma wins.
- Puzzles/tech: Intelligence is the ticket.
- Chases/time-critical: Mobility.
- Hazards/soak damage: Vigor.
-
Slot-order matters — use Coupe and slot bonuses
- Coupe benefits from placement. Put her where her En Pointe and A la Seconde bonuses trigger (first slot for Combat, second for Mobility). Table below shows each hero’s starting stats and role notes.
| Hero | Starting Stats (C/I/Ch/M/V) | Role Notes |
|---|---|---|
| Sonar | Combat: 2, Intelligence: 4, Charisma: 3, Mobility: 2, Vigor: 1 | Hybrid shapeshifter: stat swap after transforming; pairs with Malevola |
| Flambae | Combat: 4, Intelligence: 1, Charisma: 2, Mobility: 3, Vigor: 2 | Momentum fighter; high-risk, high-reward; pairs with Prism |
| Invisigal | Combat: 3, Intelligence: 2, Charisma: 1, Mobility: 3, Vigor: 3 | Solo operative; time reductions when alone; pairs with Golem |
| Coupe | Combat: 4, Intelligence: 3, Charisma: 1, Mobility: 3, Vigor: 1 | Position-based assassin; pairs with Punch Up |
| Punch Up | Combat: 3, Intelligence: 1, Charisma: 3, Mobility: 1, Vigor: 4 | Unstoppable brawler; can't be permanently downed; pairs with Coupe |
| Malevola | Combat: 3, Intelligence: 2, Charisma: 3, Mobility: 2, Vigor: 2 | Support healer; heals and gains stat boosts; pairs with Sonar |
| Golem | Combat: 3, Intelligence: 1, Charisma: 3, Mobility: 1, Vigor: 4 | Adaptive tank; redistributes stats; pairs with Invisigal |
| Prism | Combat: 4, Intelligence: 2, Charisma: 4, Mobility: 1, Vigor: 1 | Illusion master; duplicates adjacent hero; pairs with Flambae |
| Phenomaman | Maxed stats | Extremely strong but has depression mechanics — plan for downtime |
| Waterboy | Variable boosts when neglected | Auto-assigns and gains mission-based boosts; can disrupt planning |
-
Play to power synergies
- Sonar + Malevola: Sonar’s transformations and Malevola’s Life Trade play well together — Sonar gets mobility/flight while Malevola keeps the team topped.
- Flambae + Prism: Prism’s duplication makes Flambae’s on-fire stacks and Supernova nastier faster.
- Invisigal + Golem: Invisigal likes solo runs and reveals info; Golem adapts to fill holes.
- Coupe + Punch Up: Coupe positions for critical strikes while Punch Up soaks and grows when injured.
-
Manage risky mechanics
- Flambae’s Supernova gives massive payoff but catastrophic failure penalties; only use when mission success feels locked.
- Phenomaman’s maxed stats come with depression — have rotation backups.
- Waterboy will auto-assign if ignored; keep an eye or he’ll ruin a careful lineup.
-
Leveling priorities
- Prioritize the hero's primary stat first (e.g., Combat for Coupe), then secondary. Spread points on generalists evenly.
- Remember: failed missions give no XP. If a mission looks dicey, don’t throw a specialist at it and waste progress.
-
Advanced tweaks
- Use Sonar’s Strong Back to move non-flying heroes into high-Mobility positions when travel time is a bottleneck.
- Use Prism to copy high-value adjacent heroes on crucial missions — Perfect Copy is a game-turner.
If you want a quick reference, this table shows key powers and their practical use-cases:
| Hero | Key Powers | Practical Use |
|---|---|---|
| Sonar | Instincts, Strong Back, Bat Shit, Talk Shit | Swap stats, carry teammates, Mega Bat immunity, retries |
| Flambae | On Fire, Comet, Supernova | Stack Combat/Mobility, reduce times, massive but risky buff |
| Invisigal | Lone Wolf, Wolf Pack, Ear to the Ground | Solo time reductions, team XP doubling, mission reveals |
| Coupe | En Pointe, Pirouette, A la Seconde | Slot bonuses, auto retries, stronger position boosts |
| Punch Up | Hard Head, Squeeze In, Harder Head | Can't be permanently downed, creates slots, injury bonuses |
| Malevola | Life Trade, Life Trade Visions, Portal Ritual | Heals and stat gains, reveals next mission, portals |
| Golem | Diamond in the Rough, Spread Thin, Found Himself | Slot-based mods, fills empty slots, shift stat redistribution |
| Prism | Doppelganger Illusion, Perfect Copy, Long Range Illusion | Copy adjacent hero, full-stat copies, extend timers |
That's it — pair the right stat to the right job, chain synergies when you can, and don’t be shy about benching Phenomaman during his… off days.
Pro Tips
- Stack mobility on at least one hero in every four-man lineup — travel and completion time reductions win more than raw Combat in timed chains.
- Use Prism next to Flambae early in a run to hit Supernova thresholds faster; duplicated momentum stacks make Flambae go nuclear quicker.
- If a mission preview looks rough, swap in a generalist instead of risking a specialist and losing XP — failed missions give zero XP.
- Keep one hero with portal/transport utility (Malevola or Sonar) available when you plan back-to-back missions to shave travel time.
- Rotate Phenomaman into the lineup only when you have at least two backups ready; his depression mechanic can bench him for long stretches.
Common Mistakes to Avoid
- Sending Flambae into risky missions before stacking On Fire — his failure penalty is brutal if you trigger Supernova without security.
- Ignoring slot placement for Coupe — she loses most value if you don’t use her positional bonuses (En Pointe / A la Seconde).
- Letting Waterboy auto-assign — he’ll pick missions that unbalance careful synergies unless monitored.
- Treating Vigor like Combat — Vigor soaks damage but doesn’t increase combat checks; it’s survivability, not punch.