Dispatch Guide: Heroes, Builds & Fast Leveling
Quick, clear Dispatch guide for View All: hero roles, optimal stat builds, deployment tips, and fast leveling strategies for all 8 heroes. + pro tips.
TL;DR
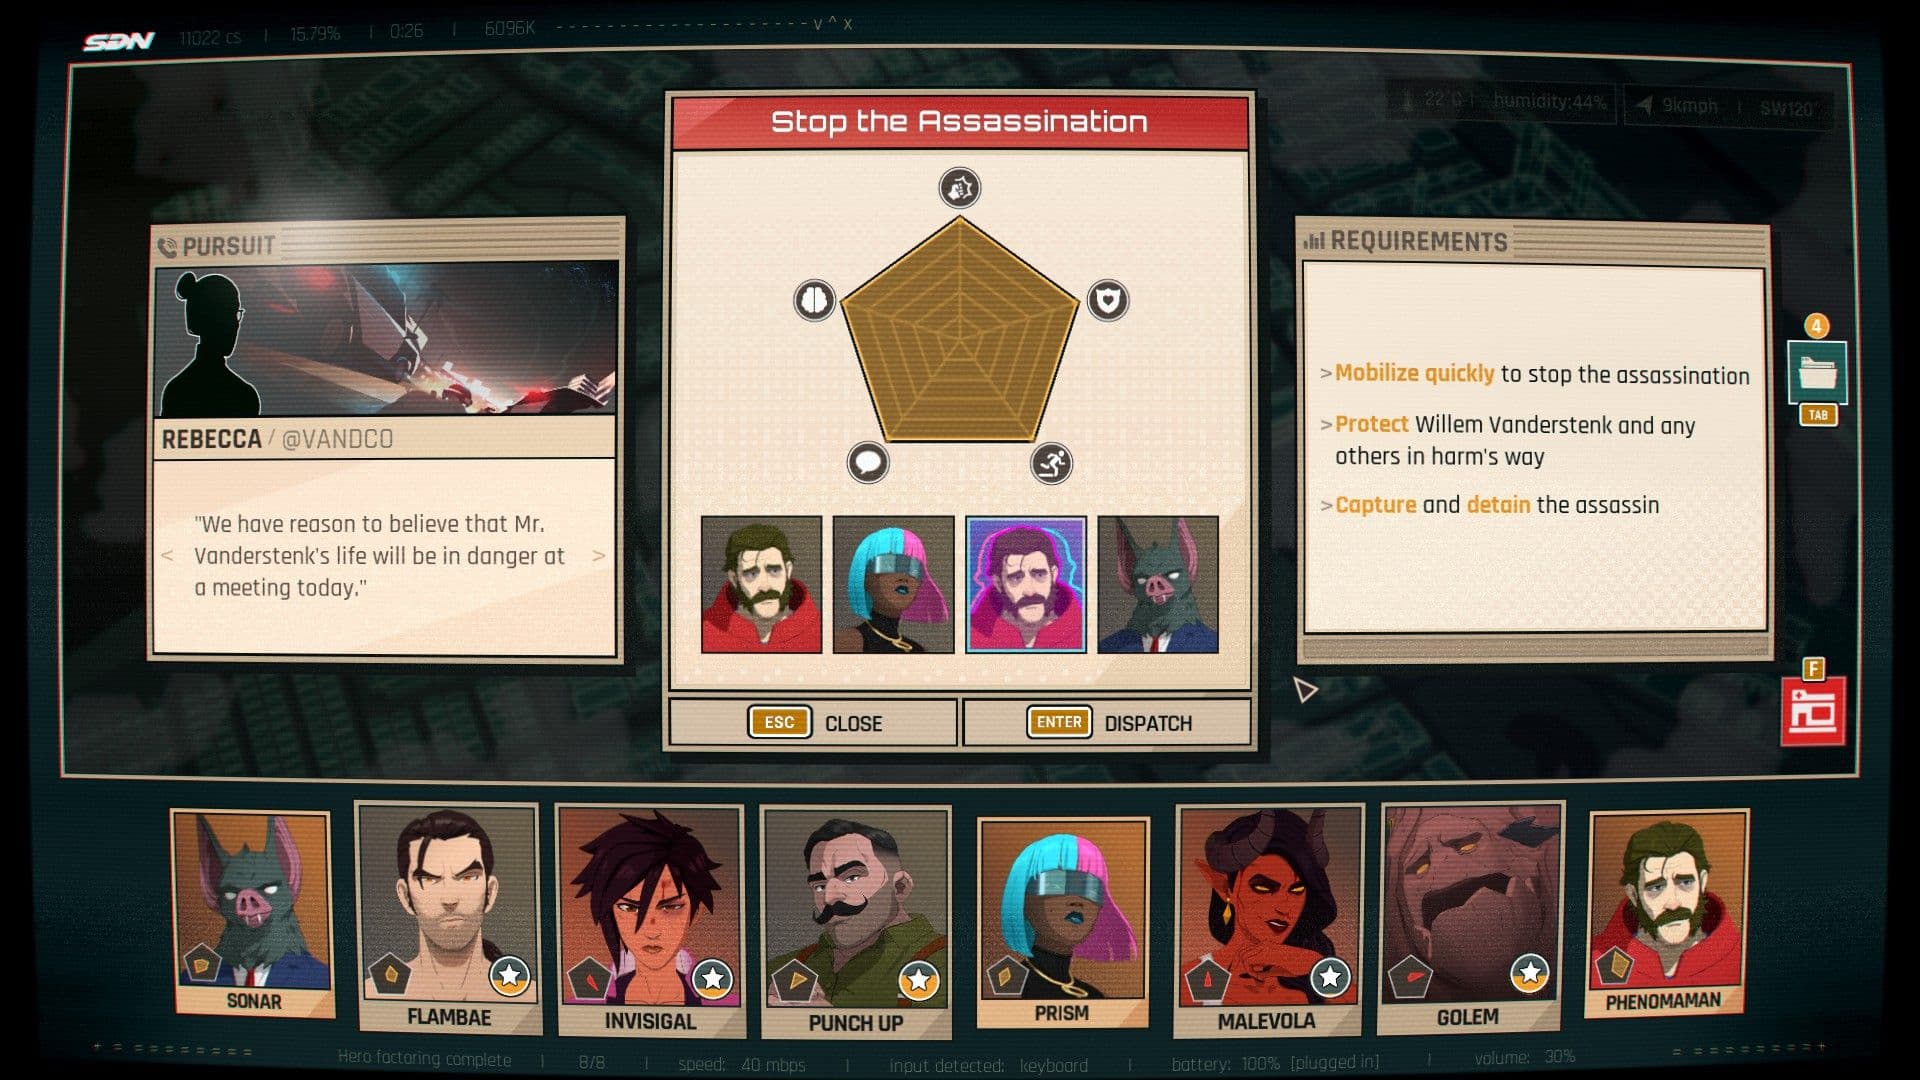
- Learn the five stats—Combat, Intellect, Charisma, Mobility, Vigor—and match mission keywords (negotiate=Charisma, investigate=Intellect, urgent=Mobility).
- Flambae and Coupe are your glass cannons: max Combat and Mobility; add Vigor if they keep dying.
- Sonar swaps Intellect/Combat and Charisma/Vigor after missions—balance those pairs. Malevola stacks healing via Life Trade.
- Prism duplicates adjacent heroes; Golem tanks and can reset stats; Invisigal shines solo; Punch Up never goes down.
What You Need to Know First
Start here if you want fewer headaches. The roster has 8 heroes with fixed starting stats. Match missions to stats and slot heroes for positional bonuses—some powers care where they sit. Below are the basics: who they are, starting stats, and quick role notes.
| Item | Effect | Where to Get |
|---|---|---|
| Flambae | Combat 4 / Intellect 1 / Charisma 2 / Mobility 3 / Vigor 2 — Pyrokinetic fighter; On Fire stacks +1 Combat & +1 Mobility on wins, resets on failure | Roster (starter hero) |
| Coupe | Combat 4 / Intellect 3 / Charisma 1 / Mobility 3 / Vigor 1 — Shadow assassin; En Pointe: +1 Combat in first slot or +1 Mobility in second | Roster |
| Sonar | Combat 2 / Intellect 4 / Charisma 3 / Mobility 2 / Vigor 1 — Hybrid transformer; Instincts swaps Intellect↔Combat and Charisma↔Vigor after missions | Roster |
| Malevola | Combat 3 / Intellect 2 / Charisma 3 / Mobility 2 / Vigor 2 — Half-Demon healer; Life Trade heals allies and gains stackable +Charisma or +Vigor | Roster |
| Golem | Combat 3 / Intellect 1 / Charisma 3 / Mobility 1 / Vigor 4 — Defender; Diamond in the Rough gives slot-based bonuses and Found Himself resets stats once per shift | Roster |
| Invisigal | Combat 3 / Intellect 2 / Charisma 1 / Mobility 3 / Vigor 3 — Solo operative; Lone Wolf shortens travel/completion time when deployed alone | Roster |
| Prism | Combat 4 / Intellect 2 / Charisma 4 / Mobility 1 / Vigor 1 — Illusionist; Doppelganger creates half-stat copies of adjacent heroes | Roster |
| Punch Up | Combat 3 / Intellect 1 / Charisma 3 / Mobility 1 / Vigor 4 — Indestructible brawler; Hard Head prevents downed status and injury debuffs | Roster |
Minimum recommendations before taking on mixed-hard missions:
| Item | Effect | Where to Get |
|---|---|---|
| Recommended Level | Heroes at level 6+ handle most mid-shift missions; push fragile heroes to Vigor 3+ | Leveling |
| Core Items | No special items required; prioritize stat points and ability ranks | Progression |
Tip: read mission flavor text. It literally tells you which stat the mission leans on. If you ignore it you’ll be swapping heroes between every failed run like someone learning to parallel park.
Step-by-Step Guide
This is the practical flow: who to level first, where to put points, and how to slot heroes for missions. Numbered and actionable.
-
Prioritize stat fundamentals
- First pass: get one of your tanks to Vigor 4 (Golem or Punch Up). That removes a lot of mission failure noise.
- Second: train one versatile hybrid (Sonar or Malevola) to level 5–6 so you can cover puzzles and heals.
-
Build recommendations (where to dump early points)
| Item | Effect | Where to Get |
|---|---|---|
| Combat Focus (Flambae / Coupe) | +Combat, +Mobility; add Vigor when survivability issues arise | Level-up points |
| Balanced Hybrid (Sonar) | Even split Combat/Intellect and Charisma/Vigor so transformations remain useful | Level-up points |
| Healer Core (Malevola) | Charisma + Vigor first to amplify Life Trade stacks | Level-up points |
| Tank Core (Golem / Punch Up) | Max Vigor, then Combat for threat handling | Level-up points |
-
Slotting and positional play
- Coupe benefits from first/second slot: En Pointe gives +1 Combat (1st slot) or +1 Mobility (2nd slot). If a mission needs stealth or speed, put her second. If it’s a straight fight, put her first.
- Prism should sit next to your strongest hero(s). Her Doppelganger gives half-stat copies—put her adjacent to Flambae or Punch Up depending on mission needs.
- Flambae wants action-heavy missions to stack On Fire. Avoid sending her to puzzle-heavy runs.
-
Use Sonar and Malevola as flex picks
- Sonar’s Instincts swaps core stats after each mission. Don’t overspecialize. Balance Intellect and Combat so whichever form appears, he’s useful.
- Malevola’s Life Trade stacks over team missions; prioritize Charisma/Vigor and pair her with Sonar for maximum sustain.
-
Experiment with Golem’s reset
- Golem’s Found Himself lets you reset stats once per shift. Use this to test niche builds: try one run as full Vigor tank, then reset and push Combat for offensive experiments.
-
Solo and special cases
- Invisigal lives and dies on being solo. If the mission text hints at a lone operative or short timers, send her alone to shave travel and completion time.
- Punch Up never gets downed, but that doesn’t auto-win missions—don’t neglect mission objectives that require Charisma or Intellect.
-
Fast leveling shortcuts
- Run repeatable low-risk missions with a healer + tank to farm XP safely. Use Prism duplication on longer multi-hero missions to double gain if you can keep them alive.
-
Quick reference table for deployments
| Item | Effect | Where to Get |
|---|---|---|
| Prism + Flambae | Doubles fire damage potential via Doppelganger adjacent copy | Multi-hero missions |
| Coupe + Punch Up | Precision and durability: Coupe positions, Punch Up soaks | Multi-hero missions |
| Malevola + Sonar | Healing + transformed roles keeps teams flexible | Multi-hero missions |
Follow that flow and you’ll stop feeling like you’re guessing who to send. Think like a manager who’s played too many RPGs and has a spreadsheet in their head.
Pro Tips
- When leveling Flambae, alternate between Combat and Mobility increases early to get On Fire rolling—streaks matter more than raw numbers.
- If Sonar’s swapped into the wrong form before a mission, use a low-risk scouting run to flip him without costing mission-critical resources.
- Prism’s duplication scales with the adjacent hero’s stats. Upgrade one hero to high Combat/Charisma, then park Prism next to them for maximum value.
- Use Golem’s Found Himself reset deliberately: test a niche build on one fight, then reset and keep the build that actually wins, not the one that looks cool.
- Punch Up prevents downs but not mission failure from objectives. Use him to hold lines while the rest handle objectives requiring Charisma or Intellect.
Common Mistakes to Avoid
- Tunnel-levelling Combat on Sonar—he swaps Combat and Intellect, so over-investing in one form wastes points.
- Sending Flambae to puzzle/investigation missions where her Combat-focused kit and On Fire streaks do nothing.
- Ignoring positional bonuses—Coupe and Prism lose a lot of value if slotted randomly.
- Relying on Punch Up as a full solution and neglecting Charisma/Intellect requirements on missions.