
skate. Beginner Guide — Flick-It, Quick-Drop & San Vansterdam
Master skate.'s Flick-It controls, Quick-Drop building, district reputation, and off-board parkour to go from fresh spawn to San Vansterdam local legend.
TL;DR
- Learn Flick-It: the right stick controls Ollie timing, diagonal flicks for Kickflips/Heelflips, and speed-based snaps.
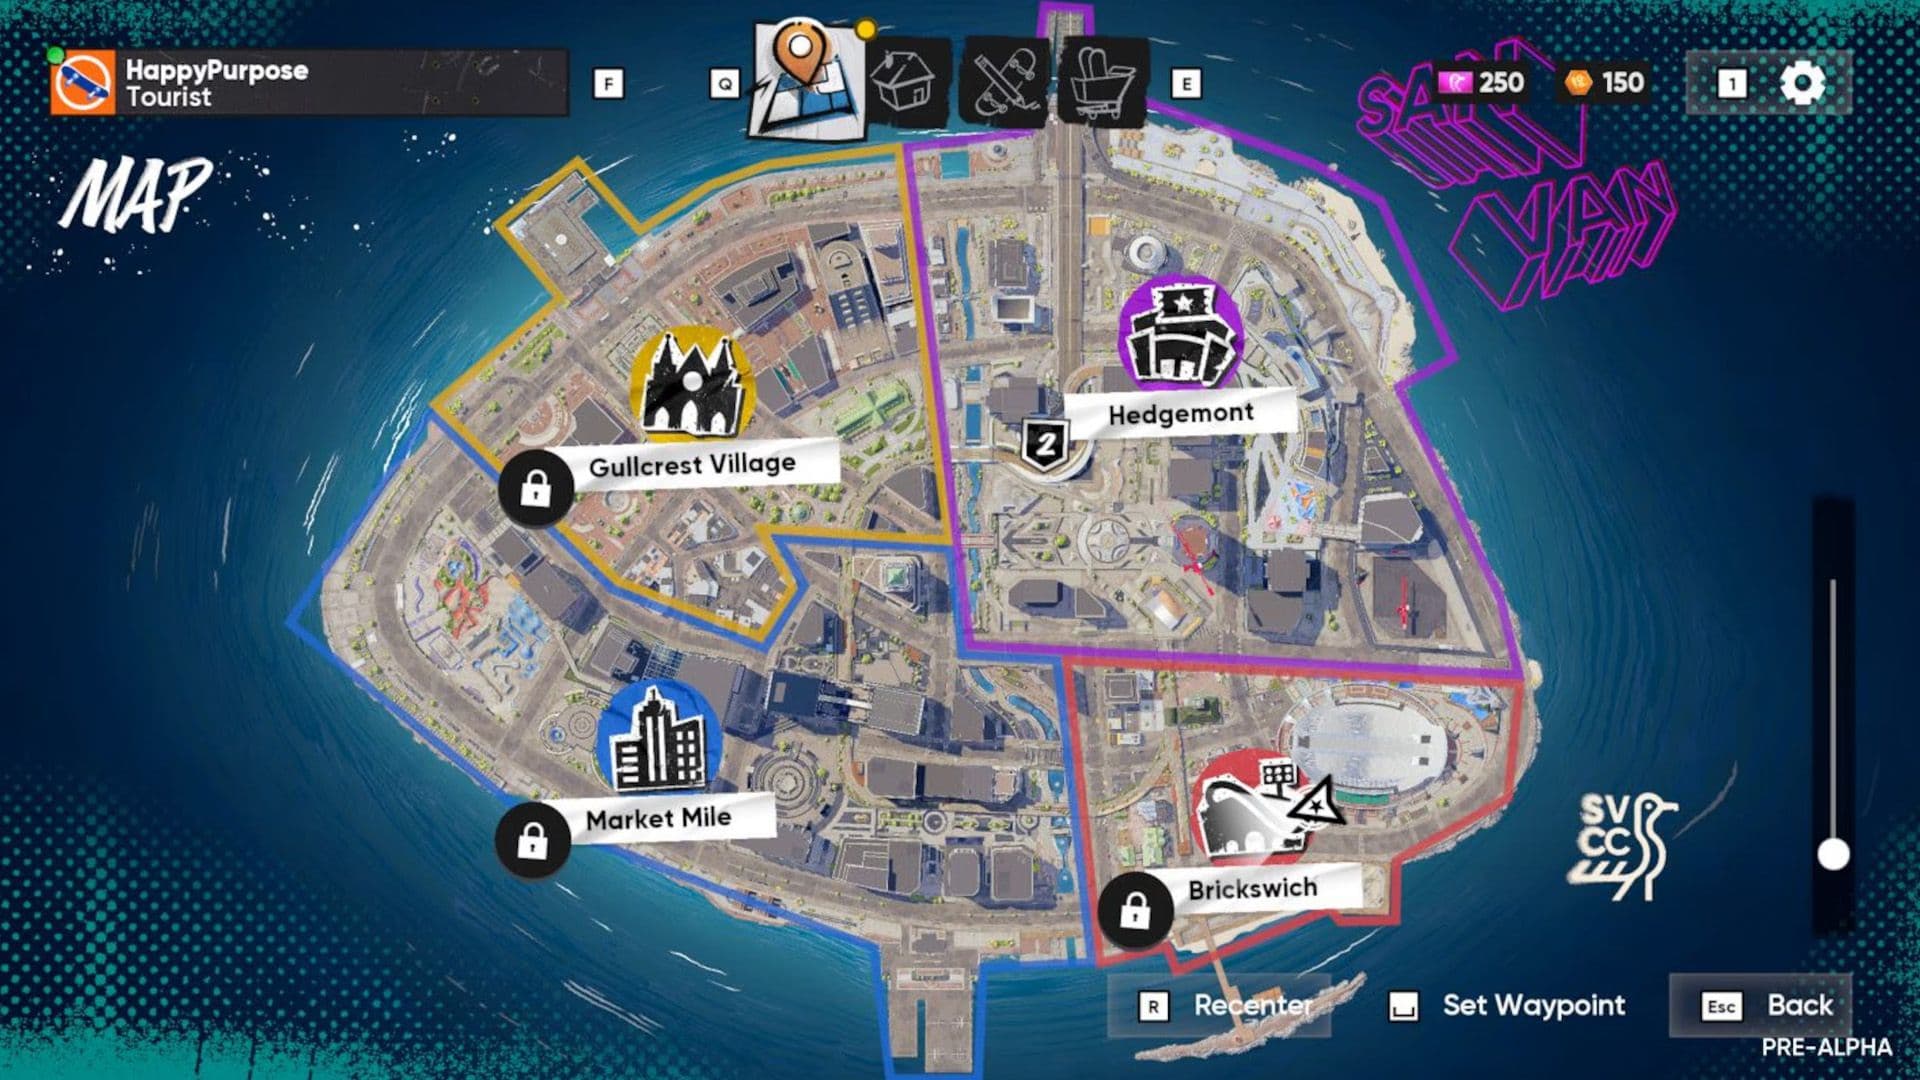
- Prioritize Fast Travel points and district reputation in Hedgeman, Gold Crush Village, and Market Mile.
- Use Quick-Drop to place ramps, rails, and ledges; convert your best setups into Throwdowns for points and replay value.
- Enable Firecrackers, learn Caveman grabs for clutch landings, and use Spectate to learn pro lines instead of wandering blind.
What You Need to Know First
Start here if you want to stop looking like a fresh spawn. skate. is always-online, multiplayer, and built around the Flick-It philosophy — your right stick is basically your feet. You don't need endgame gear to have fun, but there are a few clear prerequisites and helpful things to unlock early.
| Item | Effect | Where to Get |
|---|---|---|
| Flick-It basics | Controls ollie, kickflips, heelflips, speed-based snap variation | Default control scheme (practice in tutorial) |
| Fast Travel points | Save traversal time across San Vansterdam | Unlock via district reputation activities |
| Rip Score | Main progression currency, unlocks gear and Tours | Earn by landing tricks, challenges, exploration |
| Quick-Drop | Place ramps/rails/ledges anywhere on server | Available from object menu at start |
| Firecrackers (setting) | Smooth manual down stair sets when enabled | Settings > Gameplay > Onboard Settings (disabled by default) |
| Caveman technique | Grab board mid-air to secure landings | Player input: Triangle (PlayStation) / Y (Xbox) during airtime |
| Spectate | Teleport to other players and learn lines | Player list > Spectate |
Minimum recommended approach: complete the in-game tutorial (it actually teaches Flick-It properly), unlock at least one Fast Travel point in your starting district, and enable Firecrackers if you plan to manual stair sets. Reputation runs in each district are capped by a 1-10 system; hitting a couple levels early saves a lot of backtracking later.
Step-by-Step Guide
This is the practical path I recommend. Follow it in order and you’ll go from awkward paddler to someone who can string together decent runs.
-
Finish the tutorial and commit to Flick-It fundamentals.
- Spend the first 30–60 minutes on Ollies at different speeds. A slow pop gives flow, a fast pop gives snap. Practice diagonal flicks for Kickflips and Heelflips. Don’t try long combos until these feel consistent.
-
Learn the control breakdown (save this table and refer to it):
| Item | Effect | Notes |
|---|---|---|
| Right stick back + forward | Ollie | Foundation for every trick; timing matters |
| Right stick diagonal flicks | Kickflips / Heelflips | Angle and speed change snap vs flow |
| Left stick | Steering and carving | Small inputs make a smooth line |
| A (Xbox) / X (PlayStation) | Push for speed | Rhythm is everything |
| Triangle (PS) / Y (Xbox) | Caveman grab | Press right before landing to secure bail-prone tricks |
-
Prioritize Fast Travel and district reputation.
- Start in Hedgeman or the area you spawn in. Complete local challenges to raise reputation (districts go 1-10). Fast Travel points eliminate a ton of dead time when chasing lines or events.
-
Use Spectate to reverse-engineer lines.
- Pull up the player list, watch a skilled player run a spot, and teleport to them. You’ll learn routes and find hidden geometry faster than trial-and-error. Treat it like copy-editing a perfect clip.
-
Quick-Drop everything, then make Throwdowns.
- If you see a rooftop or awkward gap, Quick-Drop a ramp and test it. Once a setup feels good, convert it into a Throwdown so others can compete for score. Throwdowns are the easiest way to give your creations replay value and board traffic.
-
Enable Firecrackers and master Caveman for cleaner landings.
- Settings > Gameplay > Onboard Settings to enable Firecrackers. For Caveman, press Triangle (PlayStation) / Y (Xbox) during airtime before landing; it turns sketchy bails into clean saves.
-
Build progression into your sessions: Rip Score and Tours.
- Do a mix of spot runs, daily district challenges (they reset every 24 hours), and Tours when available. Rip Score accumulates from most actions — treat it as XP for both cosmetics and access to more structured content.
-
Camera and clip setup for content creators.
- Press both analog sticks to toggle camera heights; in Settings > Camera you can set FOV up to 120°. Centering the onboard camera or moving it slightly off-center helps nail cinematic shots without fighting your view.
Quick table for district names and status:
| District | Status | Tip |
|---|---|---|
| Hedgeman | Accessible | Good starting lines and local challenges |
| Gold Crush Village | Accessible | Longer gaps, ideal for speed runs |
| Market Mile | Accessible | Dense obstacles and more players |
| Brick Switch | Locked / Future update | Keep an eye on patch notes |
Follow those steps and you’ll waste less time learning the UI and more time finding good lines. Also, watch your Rip Score — it’s the one number that actually moves your progression.
Pro Tips
- Practice flick speed more than angle at first. Your brain will learn timing faster than it will adapt to micro-angle corrections, and sneakier flick speeds change snap more than tiny directional differences.
- When you find a hidden rooftop or odd gap, build a Quick-Drop stair stack to reach it consistently before spending rep to unlock Fast Travel there. Cheap creativity beats long runs.
- Turn Throwdowns into scripted practice: record a good run, then challenge yourself to reproduce it until the line is muscle memory. The leaderboards reward consistency, not flash.
- If a stair set feels impossible to manual, enable Firecrackers and practice the manual rhythm on smaller sets. Manualing down stairs is more about steady input than raw timing.
- Use Caveman grabs as a bailout tool. It’s not flashy, but a timely Triangle/Y will save combos and keep your Rip Score climbing when you’d otherwise eat concrete.
Common Mistakes to Avoid
- Ignoring the tutorial and blaming controls — the Flick-It system is punishingly different if you skip the basics.
- Spamming Quick-Drop without testing — build clutter can ruin a good line for everyone if you place ramps in bad spots.
- Chasing high Rip Score in one session instead of unlocking Fast Travel — inefficient grinding eats your time.
- Walking into every line without Spectate first — you’ll miss cleaner approaches other players already discovered.